This type of braiding, also known as a Dutch braid, boxer braids, or reverse braids, can be difficult. A Dutch braid strands the hair underneath the sections of hair to give it a 3-D or elevated appearance, unlike the conventional three-strand French braid.
A Dutch braid may be done by anyone with any type of hair. The possibilities for hairstyles are virtually limitless once you’ve mastered the art. You can create boxer braids, braided updos, and more. Allow us to simplify Dutch braiding if you’ve always wanted to learn how to do it but were afraid. To save you time, we searched the internet for detailed instructions on how to do Dutch braids.
Making a Dutch Braid
Begin by brushing your hair.
Brushing out the knots is crucial whether you are braiding dry or moist hair. By doing this, you’ll prevent the three strands you’ll later form from being tangled with the rest of the hair.
Part the hair.
Create a center part from the top of the head to the nape of the neck using a comb with a fine tail. A center part will give off the classic boxer braided appearance. Using this technique, the hair is divided into two equal pieces and distributed evenly. It also allows you two chances to polish the look, and as they say, practice makes perfect. (Once you know how to Dutch braid, you can experiment with different hair parts.)
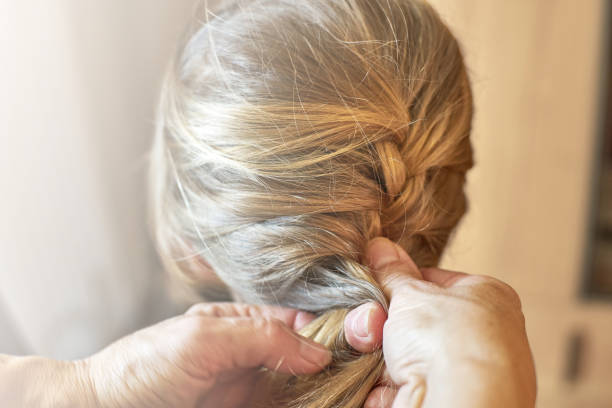
Collect three little hair fragments.
The exciting part is here now! To get the side of your hair you aren’t using out of the way, bun it. At the front of your head, divide a section of hair into three equal pieces.
Underneath the center area of hair, place the front segment of hair. Next, using the new middle part as a guide, tuck the back section of hair under the middle section. Continue weaving the strands underneath the central part while repeating this.
You’ve finished making the top of your braid after repeating this pattern twice. Grab more hair from the exterior parts as you continue. The most challenging aspect of this braiding method is this. Editor’s tip: Use a hair pomade to add traction to your strands and make it simpler to braid if you have fine, silky hair that doesn’t hold.
Repeat the design.
Adding more hair to the exterior sections of the braids is the main goal of this technique. Pick up some loose hair, starting with the back part, and connect it with the back piece to form a new section of hair. Repeat this procedure on the front piece of hair after weaving that back section of hair underneath the middle strands. Continue to weave under the central piece as you gather additional hair.
Repeat the process of adding hair until you have covered your entire head. You’ll have three sections of hair left over once you get to the nape of your neck to complete a standard three-strand braid.
Secure.
You’re ready to move on to the other side after securing the braid with a hair elastic.